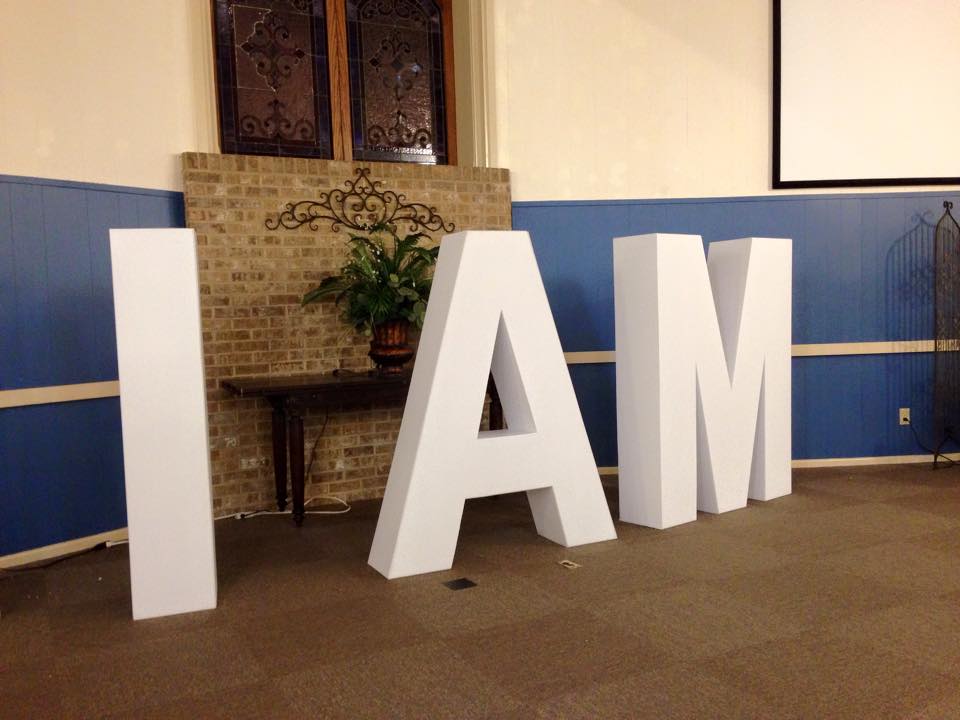
My friend Duncan Campbell showed me some beautiful huge 3D letters he created using affordable corrugated plastic. This is what he said about his innovative project.
If you’ve ever wanted some extra large 3D letters, and you’ve done any Googling at all, you know that 5′ foam letters cost about as much as titanium. Here’s a little tutorial for the DIY version made from corrugated plastic rather than foam. Working by yourself, figure on about two hours per letter to construct. Bonus: when finished, you can project video or stills onto the letters with a mask and really make them pop. See Crowd Control Games for their magical Mask-R-Aid.
Supplies
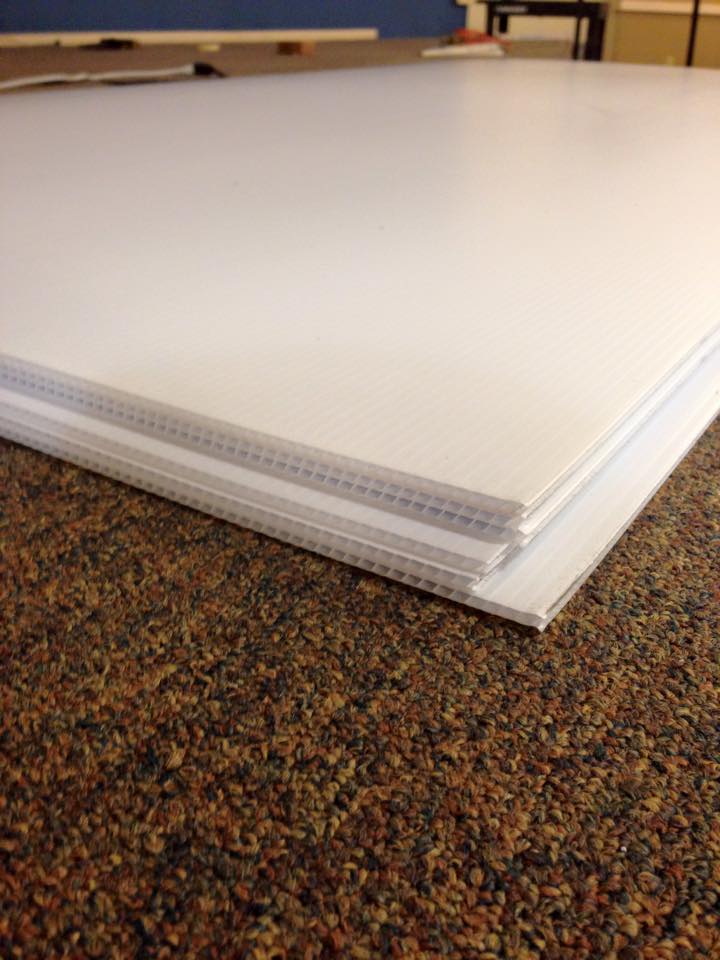
- 4’x8′ sheets of 3⁄8″ corrugated plastic, the stuff that looks like plastic
- cardboard. Available from most sign companies, although they typically don’t sell them by the sheet. They may have to order you some. “Coroplast” is a brand name. A local place sold them to me for $24/each. I wouldn’t recommend thinner than 3⁄8″.
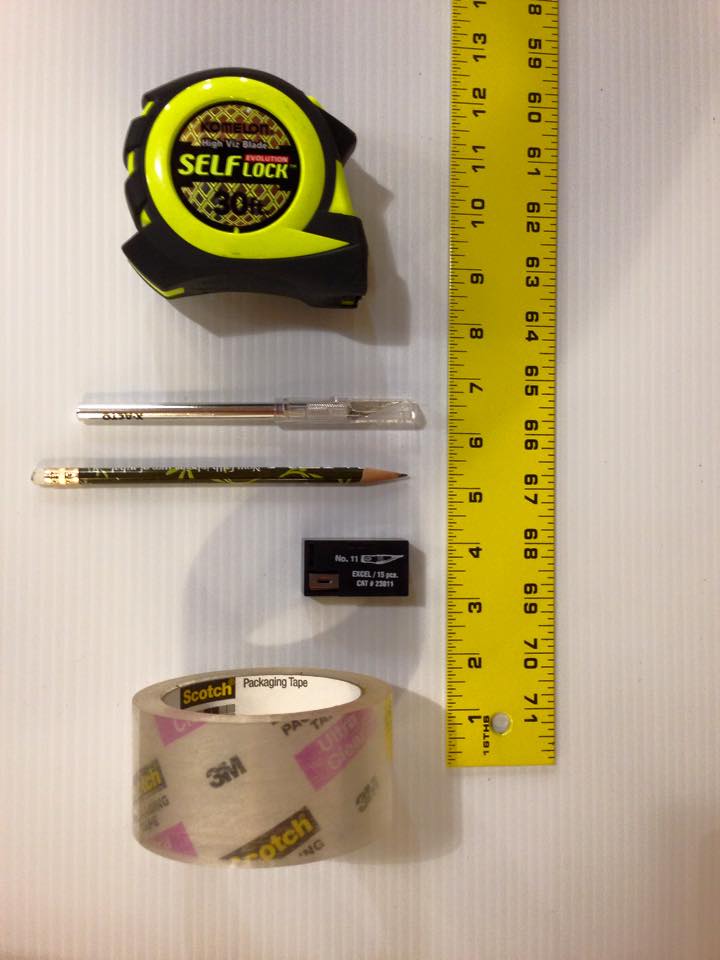
- 72” metal straight edge
- Big pack of Xacto blades.
- Tape. Most any tape will do, but clear packing tape is best.
Steps
A. Create your letters on the computer
- For this example, my end goal was letters 5′ tall by 4′ wide. So I made a page 5 inches by 4 inches in Pixelmator and skewed my Helvetica letters to fill the page.
- You could also do this in Pages or even Word. Just create a text box, type your letter (do one at a time) and change the size until it fits the page.
- This step isn’t strictly necessary, but it saves a lot of guess work on the back end.
B. Get your plastic
- How many sheets you’ll need depends on the total surface area you want your letters to be, so do some math to make sure you don’t buy less than you need, adding 20% for error of this is your first time.
- I made three 5×4 letters that were 11.5″ deep and used 5 whole sheets with lots of scraps left over.
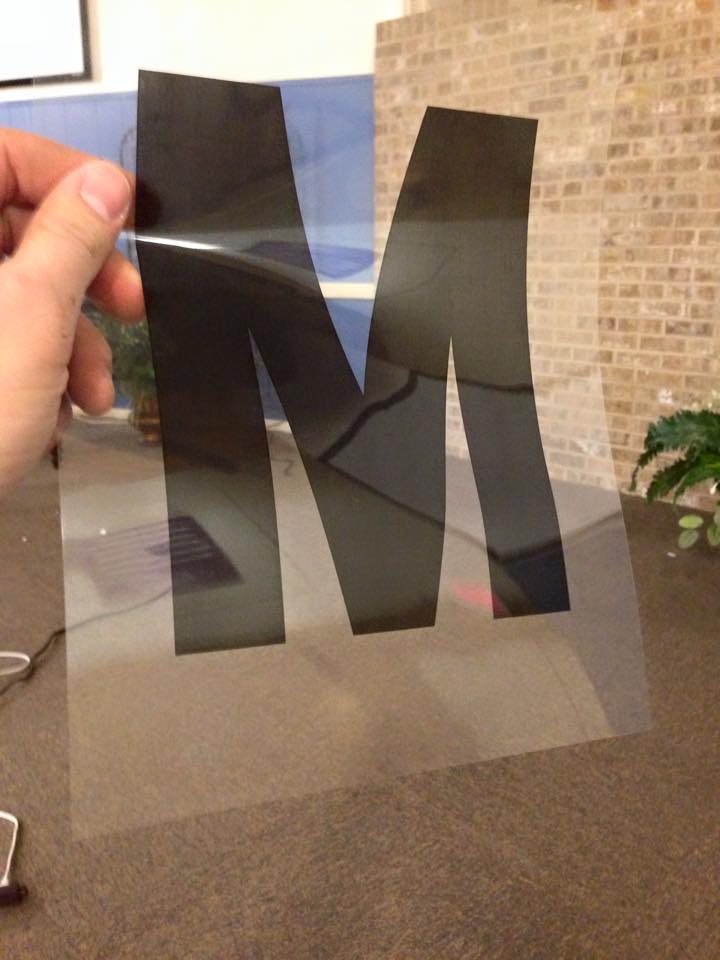
C. Get the Letters on the Plastic.
- Attach a sheet of the plastic flat against a wall and project your letter on it, either with a computer projector or an old school overhead. Get it the size you want, remembering that the size of your first letter must be easily repeatable.
- Don’t worry about marking lines; just mark the corners with dots. You’ll connect the dots later with the straight edge.
- I recommend placing your letter image in the middle of the sheet rather than the top or bottom edge; see below.
- NOTE: If you’re making curved letters, then you have to draw the lines freehand. Use your arm as a compass with your elbow as the point. Good luck. The good news is pencil erases easily from Coroplast.
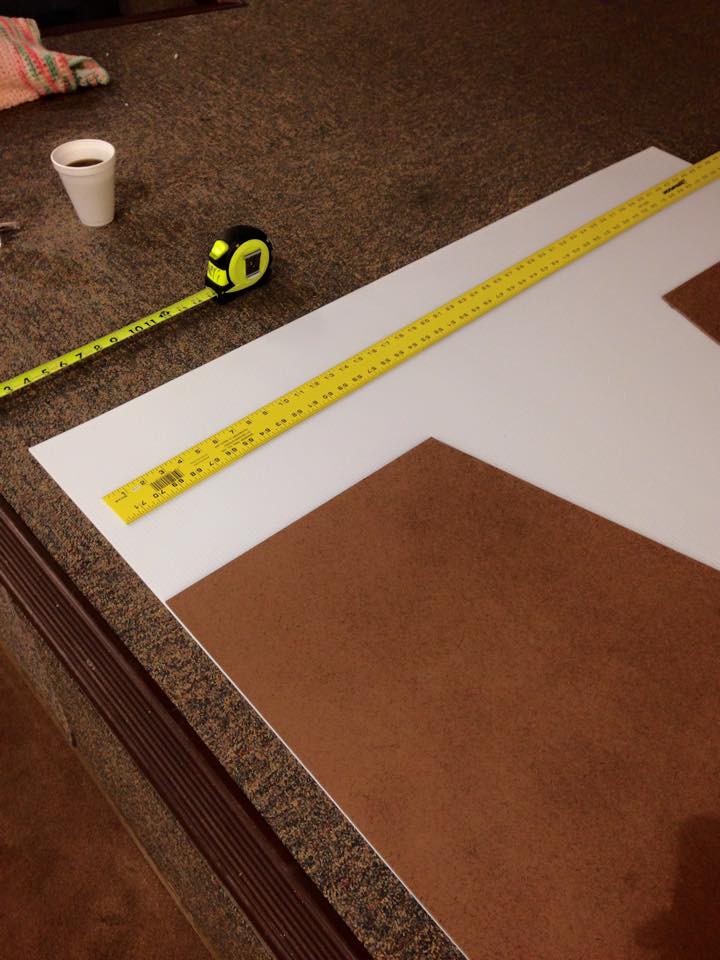
D. Use the straight edge to connect the lines, then cut with the Xacto knife.
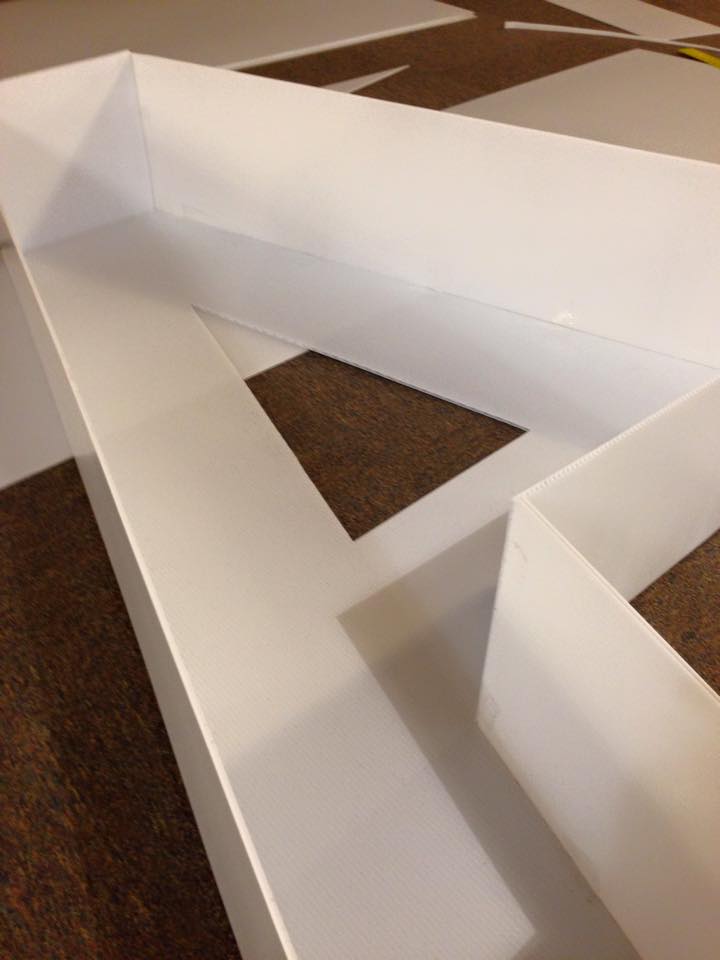
- If you want your letter to be 8″ deep, then leave 8″ of space between the top of your letter and where you cut. This will create a flap that will form the top surface of your letter. Repeat on the bottom.
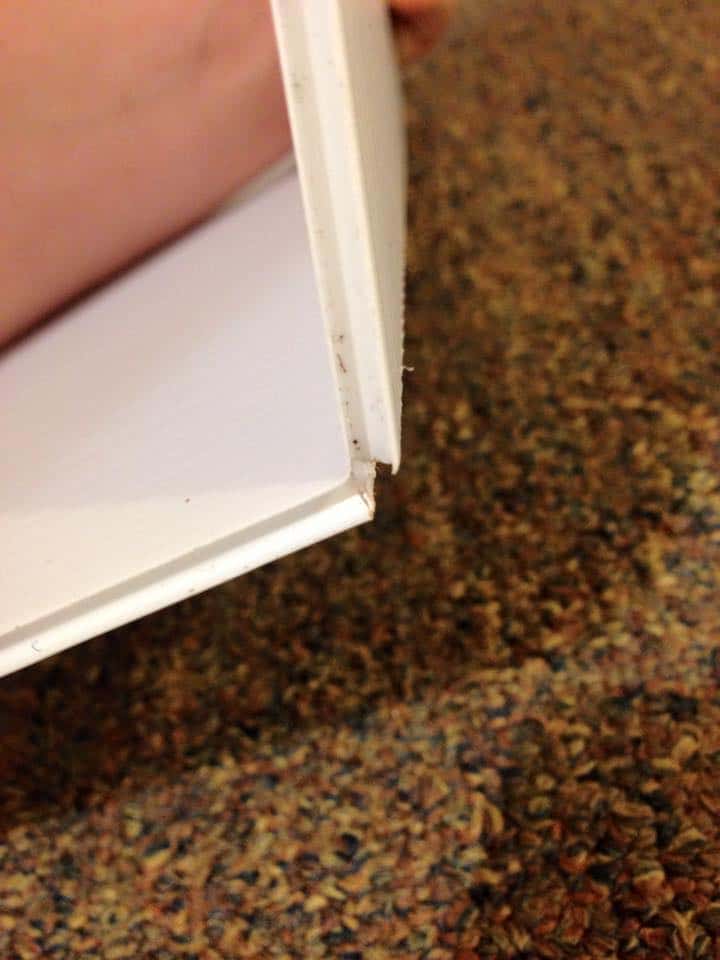
- Some of your cuts will be straight through the material, but some of your cuts you’ll only “score” halfway through. This will allow you to bend an edge and create sharp, closed edges. Don’t cut what you only need to score.
- Once the basic letter shape is cut out with top and bottom flaps, use your tape measure to measure specifically-sized pieces to cut for the edges. They will all be the same width as your top and bottom flaps. Remember: measure twice, cut once.
- You’ll have to freehand cut the curved letters, there’s just no way around it. But they’re easier if you cut the curves 3-4 inches at a time rather than one long curved cut. Cut so that you err into the scrap rather than the letter.
- For the pieces that will make up the edges of the curved letters, you’ll have to cut a rectangle for the edge piece, then score it about every 2-3 inches depending on how steep the curve. Cut your edge piece longer than you need because you’ll lose some length in the scoring and curving.
D. Assembly
- Bend the top and bottom flaps and tape them at 90o to the face.
- Tape the edge pieces to the front piece at 90o using the packing tape. 2 inch lengths of tape will do the trick.
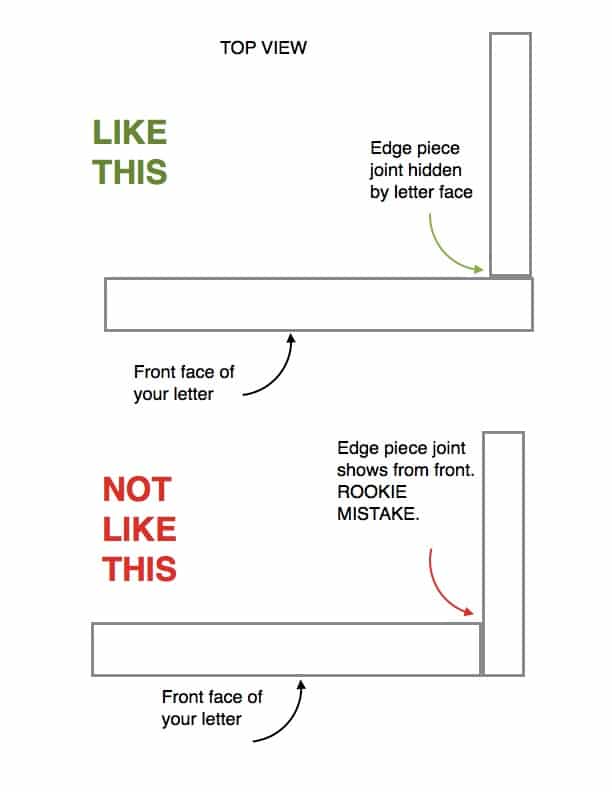
- Pay attention to how you make the joints of the edge pieces so that none of the edges of the edge pieces will show when the letter is complete. I.e., when looking at your finished product you should only see the front face of the letter, not the front face and the edge of the edge. Your scored edges will show, but that’s okay. The stability of the score trumps seeing the edge on the top and bottom flaps.
- If your letters will only be seen from the front, you can leave the back exposed, as I did; three-sided letters instead of four-sided. Also, the further your audience will be from them, the less perfect you have to get the edges. No one sees imperfections in set pieces from 50′ or more.